How to Use the ZBrush Bend Curve Modifier
Posted on Oct 7, 2018 (last modified May 31, 2021)
Here’s how to bend things in ZBrush using the Bend Curve modifier. It's an essential technique that you will likely use a lot in your sculpting.
Take the following cylinder for example…

Let’s bend it!
Press either W, E, or R for Move, Scale, or Rotate. You can also press the Move, Scale, or Rotate icons in the top toolbar. This brings up the transform gizmo as shown below.

Press the gear icon, which brings up the Transform Type modal…
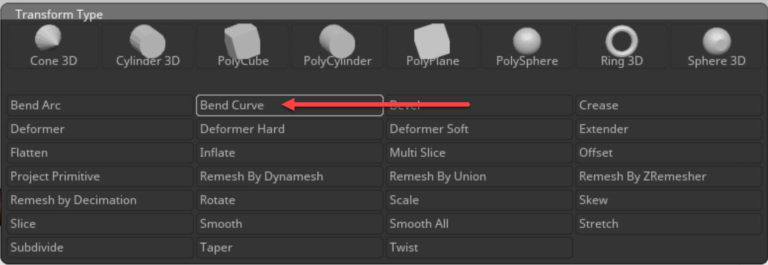
In the Transform Type modal, click the Bend Curve modifier button indicated by the red arrow above. At this point, you may get a message that the mesh is a 3D-Primitive. If so, you’ll need to click the Make PolyMesh3D button in the Tool palette to convert it.

Drag on the indicated axis cone to change the axis that you wish to bend on. We’ll pull it out one stop to position 2, which is the Y axis. You will see the yellow bend points change.

Drag the indicated cone to change the number of bend points if you want. Then just drag on the bend points to bend the PolyMesh as desired.
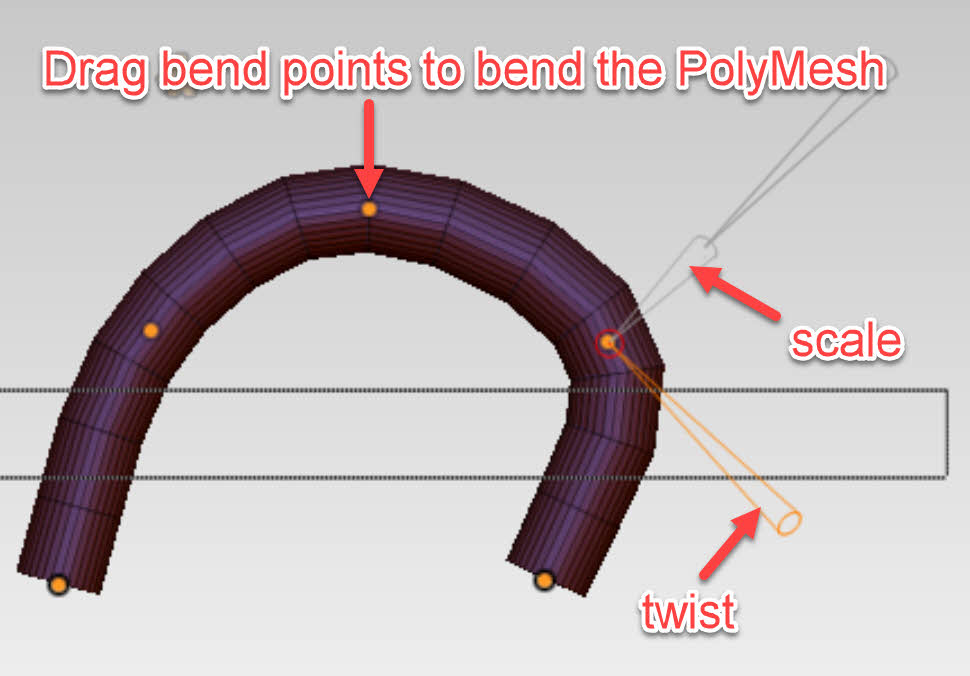
Notice that you can also drag on the indicated scale or twist cones to scale and/or twist at the selected bend point.
When you’re done bending the PolyMesh to your liking, click the gear icon again and then the Accept button to apply the changes.